This rubber band race car has been a source of fun since we made our first one years ago!
This DIY Rubber Band Racer is one of our favorite kid-friendly activities to do as a family. Our kids really like to make DIY toys, and the best part is that you can make these rubber band cars with items found around the home. There’s nothing like seeing your kids’ smiles as they make homemade toys.
We actually started a recycling program in our home to see what raw materials we could use to upcycle and make something new! The kids love to see what they find around the house to put into our “kid activities” bin. Plus, it’s an extra bonus to our natural resources; it limits the amount of waste and reduces the landfill space (helping to reduce solid waste & teaching the kids about waste management is a win-win. Good for us, good for the planet.)
This is probably one of our favorite rubber band toys we have made. In fact, it just might be our favorite DIY kid’s toy we have made (we’ve made plenty of DIY wooden cars, too). 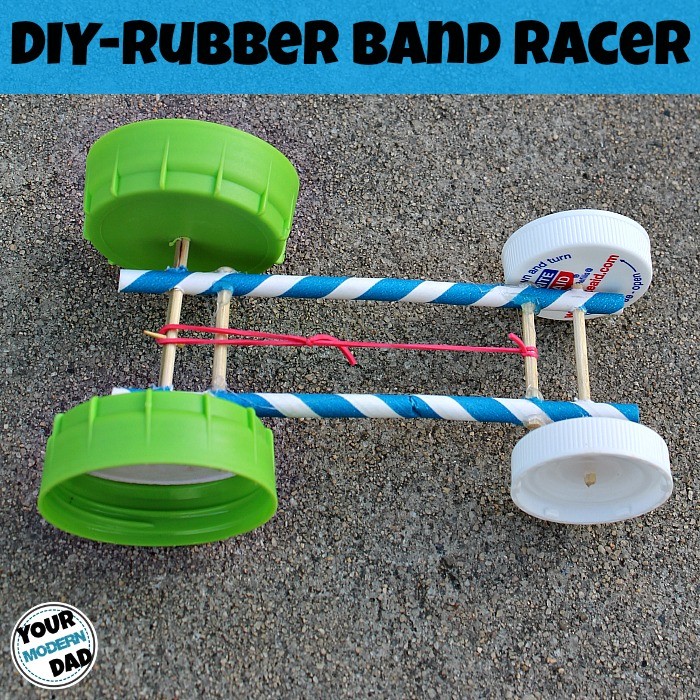
Here are the items needed for your DIY race car and the step-by-step directions for making a DIY Rubber Band Racer.
I’ll also include affiliate links to find what you need on Amazon.
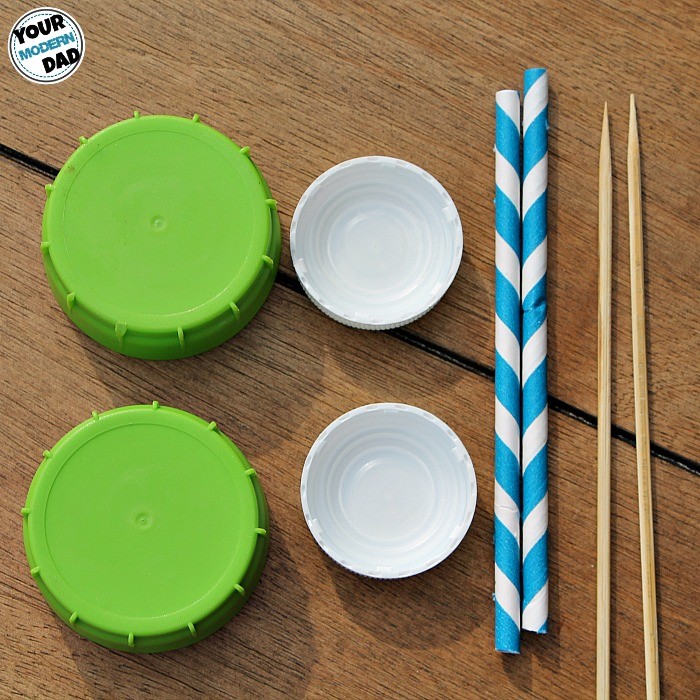
- Two straws (this will be the frame of the car). These are recycled paper straws.
- Four toothpicks (or wooden skewers). I have also used a paper clip.
- Four container lids (from a milk container or prescription caps)
- Rubberband (or Rainbow Loom Bands)
- Hot glue gun (I used a low temp since our 6-year-old was helping)
- Drill (with small drill bits)
First, I used a ruler to figure out where I wanted the placement of the holes on my straws because this is where the toothpicks are going to go (see picture below).
Note: Each straw will have four holes. Two holes are drilled at each end of the straw.
On each end of the straw, I drilled the first hole 1/2 inch in from the end, and the second hole was drilled one inch from the end. I repeated the process on the opposite side of the straw. You will repeat this process for the second straw. Both straws should look the same when you are done.
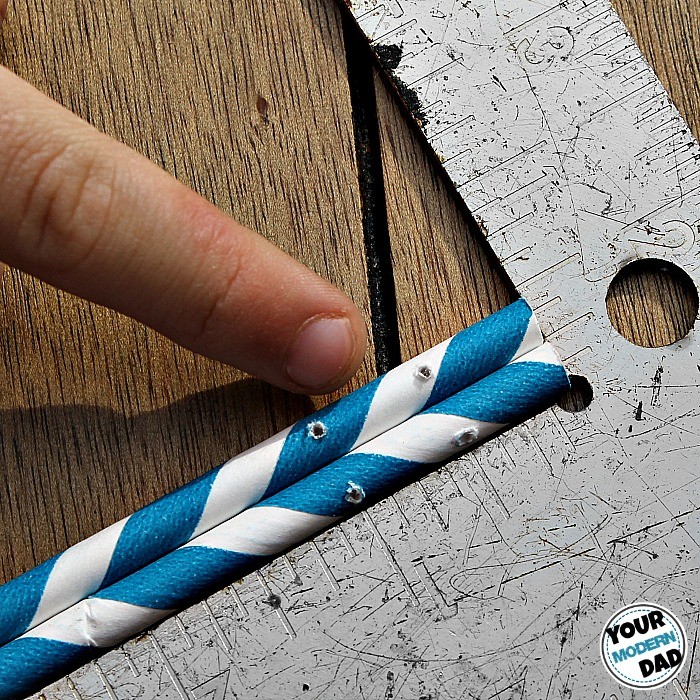
What are the holes for?
The first hole (the one closest to the end, 1/2 inch back) will be used for your wheel axles. These holes should be made a little larger and will allow your wheels to move freely.
The second set of holes (the ones that are 1 inch back) will be used for the structural supports. These holes should be a bit smaller, and the toothpick should fit snugly into each straw.
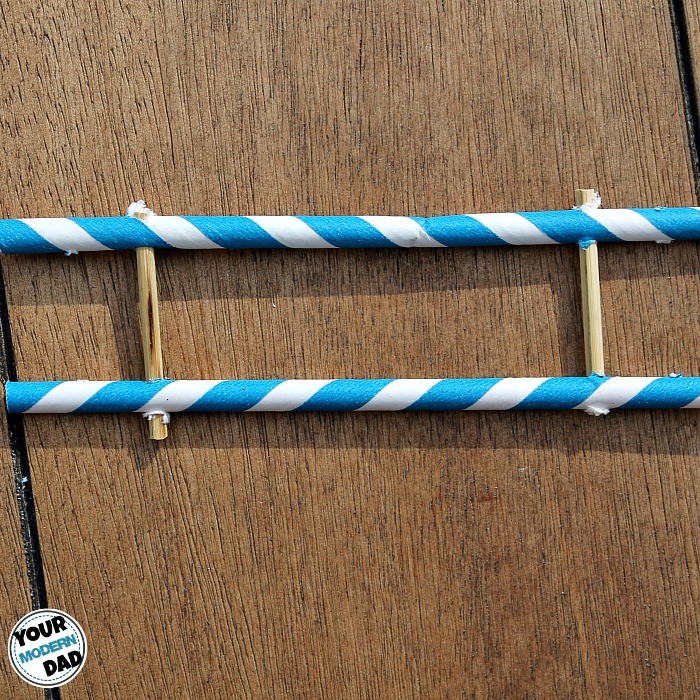
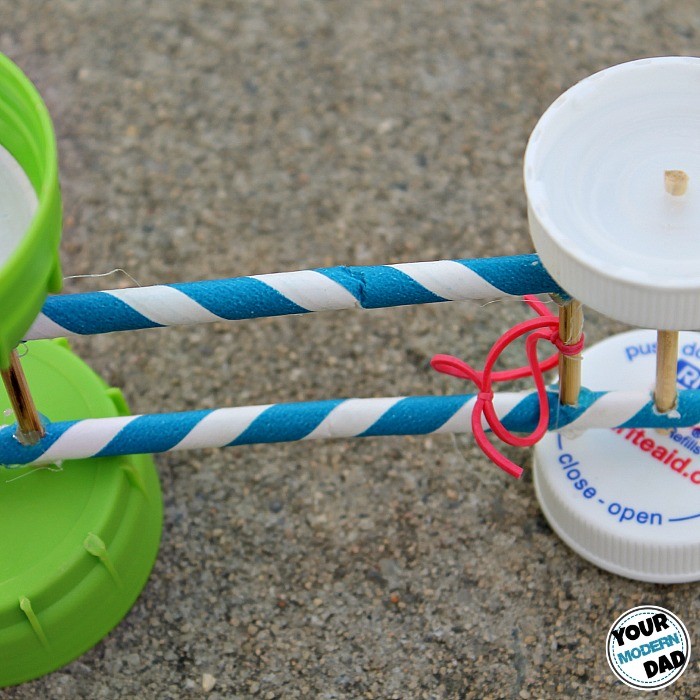
- Once you have all the holes made in your straws, you can move to the assembly of your car frame.
- You will place a toothpick through each structure hole (the hole you marked at 1 inch or the 2nd hole from the end). I recommend pushing the toothpicks through so the pointed tips stick out on both sides.
- Next, use your hot glue gun and glue the toothpicks to the straws. I would glue the inside portion first and let it dry.
- Once dry, cut the pointed ends off your toothpicks and place a little glue on the outside section of the straw.
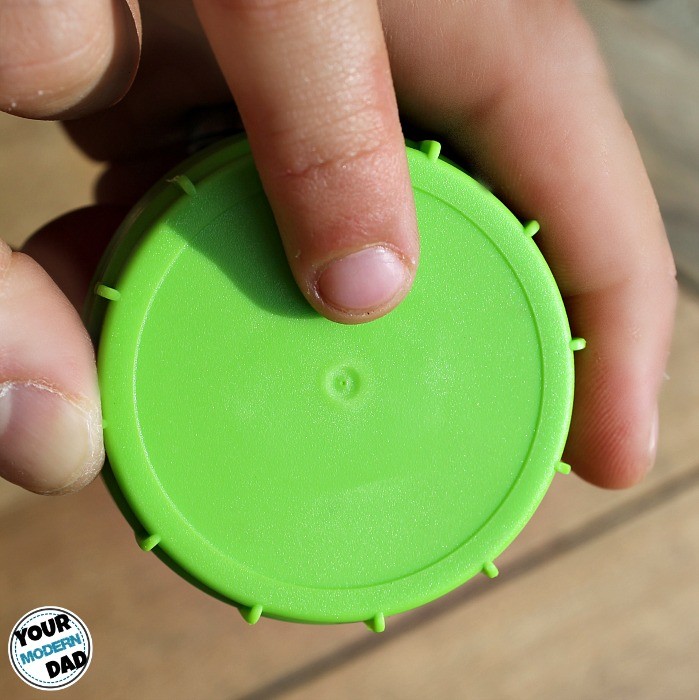
Now that the structure is built, you work on and add the wheels. This is where the lids or caps come in. Most caps you will find have a mark in the center. This is a great and perfect place to drill the hole to make the axles for your cars.
You will want to drill a hole in the center of each lid. This will be the same process as the holes you drilled in the straws. The holes in the wheels will be drilled just large enough for the toothpick to fit snugly.
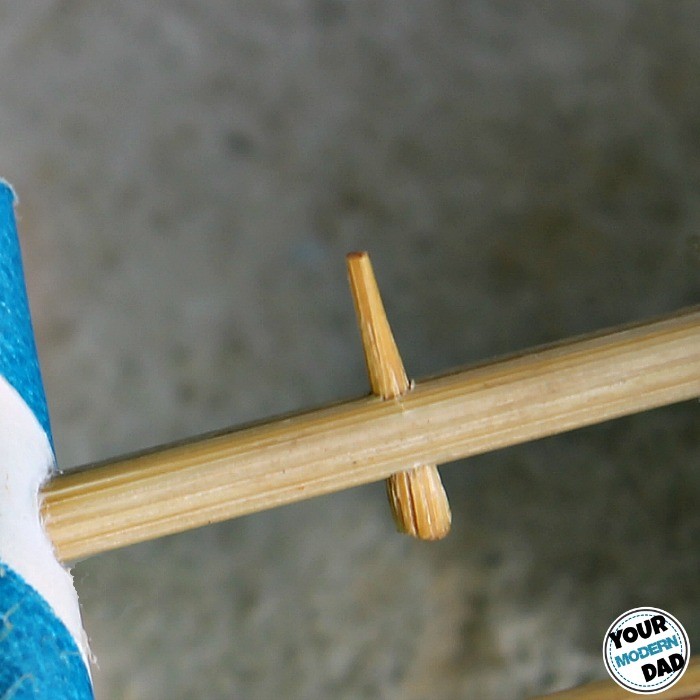
On one of the toothpicks, drill a very small hole in the center. Once the hole is drilled, you will place the toothpick ends (the point) that you cut off to make a peg (see picture below).
The peg will help when winding up the rubber band car to make it go. This toothpick will be your rear axle. Make sure to attach the larger caps to this one if using different sizes for the wheels.
- Now you are ready to assemble.
- You can start with the rear axle.
- Place the toothpick in each hole, and attach each wheel.
- Note: At this point, you will want your peg to be right in the center.
- Once the toothpick is in place, you can attach each wheel and glue them into place.
- Repeat this step for the front axle.

- Note: you may want to add more glue to the caps on the rear axle to give it some added weight. This will keep the car tires from just spinning when the car is ready. Another tip would be to use a little Playdough to pack in the caps.
Now that your car is built… Attach the rubber band to the front structure support. I did not have rubber bands, so my son made me a quick one out of his Rainbow Loom bands.
Once attached, place the opposite side on the rear axle peg and slowly wind up the tires to test it.
Now it is time to let your kids have some fun & learn about force, motion, kinetic energy, recycling, and more!
They will love playing with their new car! You can decorate it (our kids made the ‘wheels’ into United States flags once, and other times they’ve just done a little babble dabble with paint to create new designs).
Hint: Be careful if you make it while their friends are around… they will start placing orders! Haha!
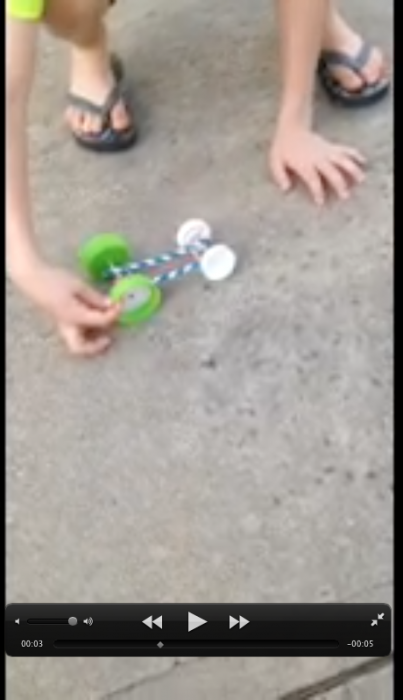
Check out our video of our DIY Rubber Band Racer & watch it go!
very nice and good project for kids…
Great directions, Mickey! Always good to have dads help with science projects!
Hi Mickey
Thank you for this post.
The straws you used looks like paper straws. Can I use the regular plastic straws?
We have used both 🙂 I used the paper ones to make this one because it stood out a little more. Also, the paper ones seemed to be a little stronger and easier to work with.
I am no longer sure the place you are getting your info, but great topic.
I needs to spend a while finding out much more or understanding more.
Thanks for magnificent information I used to be looking
for this info for my mission.
Very shortly this web page will be famous among all blogging
and site-building visitors, due to it’s good articles
or reviews
My borthers would enjoy that thing
I had a back order from the neighbors when making this car. Super simple!
Thanks for the share. I’m not quite in the tween season just yet, but when it his my house with 4 kids, I’ll be in it for like a decade.
🙂